Tutorial: a first study
This tutorial takes one study from start to finish on the toy dataset: three queries of coloured shapes, each with a
pool of 30 images, small enough to finish in about ten minutes. You switch between two accounts: admin, who runs
the study, and alice, who judges it.
Before you begin
CARA runs with the toy data: bash quickstart.sh --toy (Installation). Use a private
browser window for one of the two accounts, so both stay logged in.
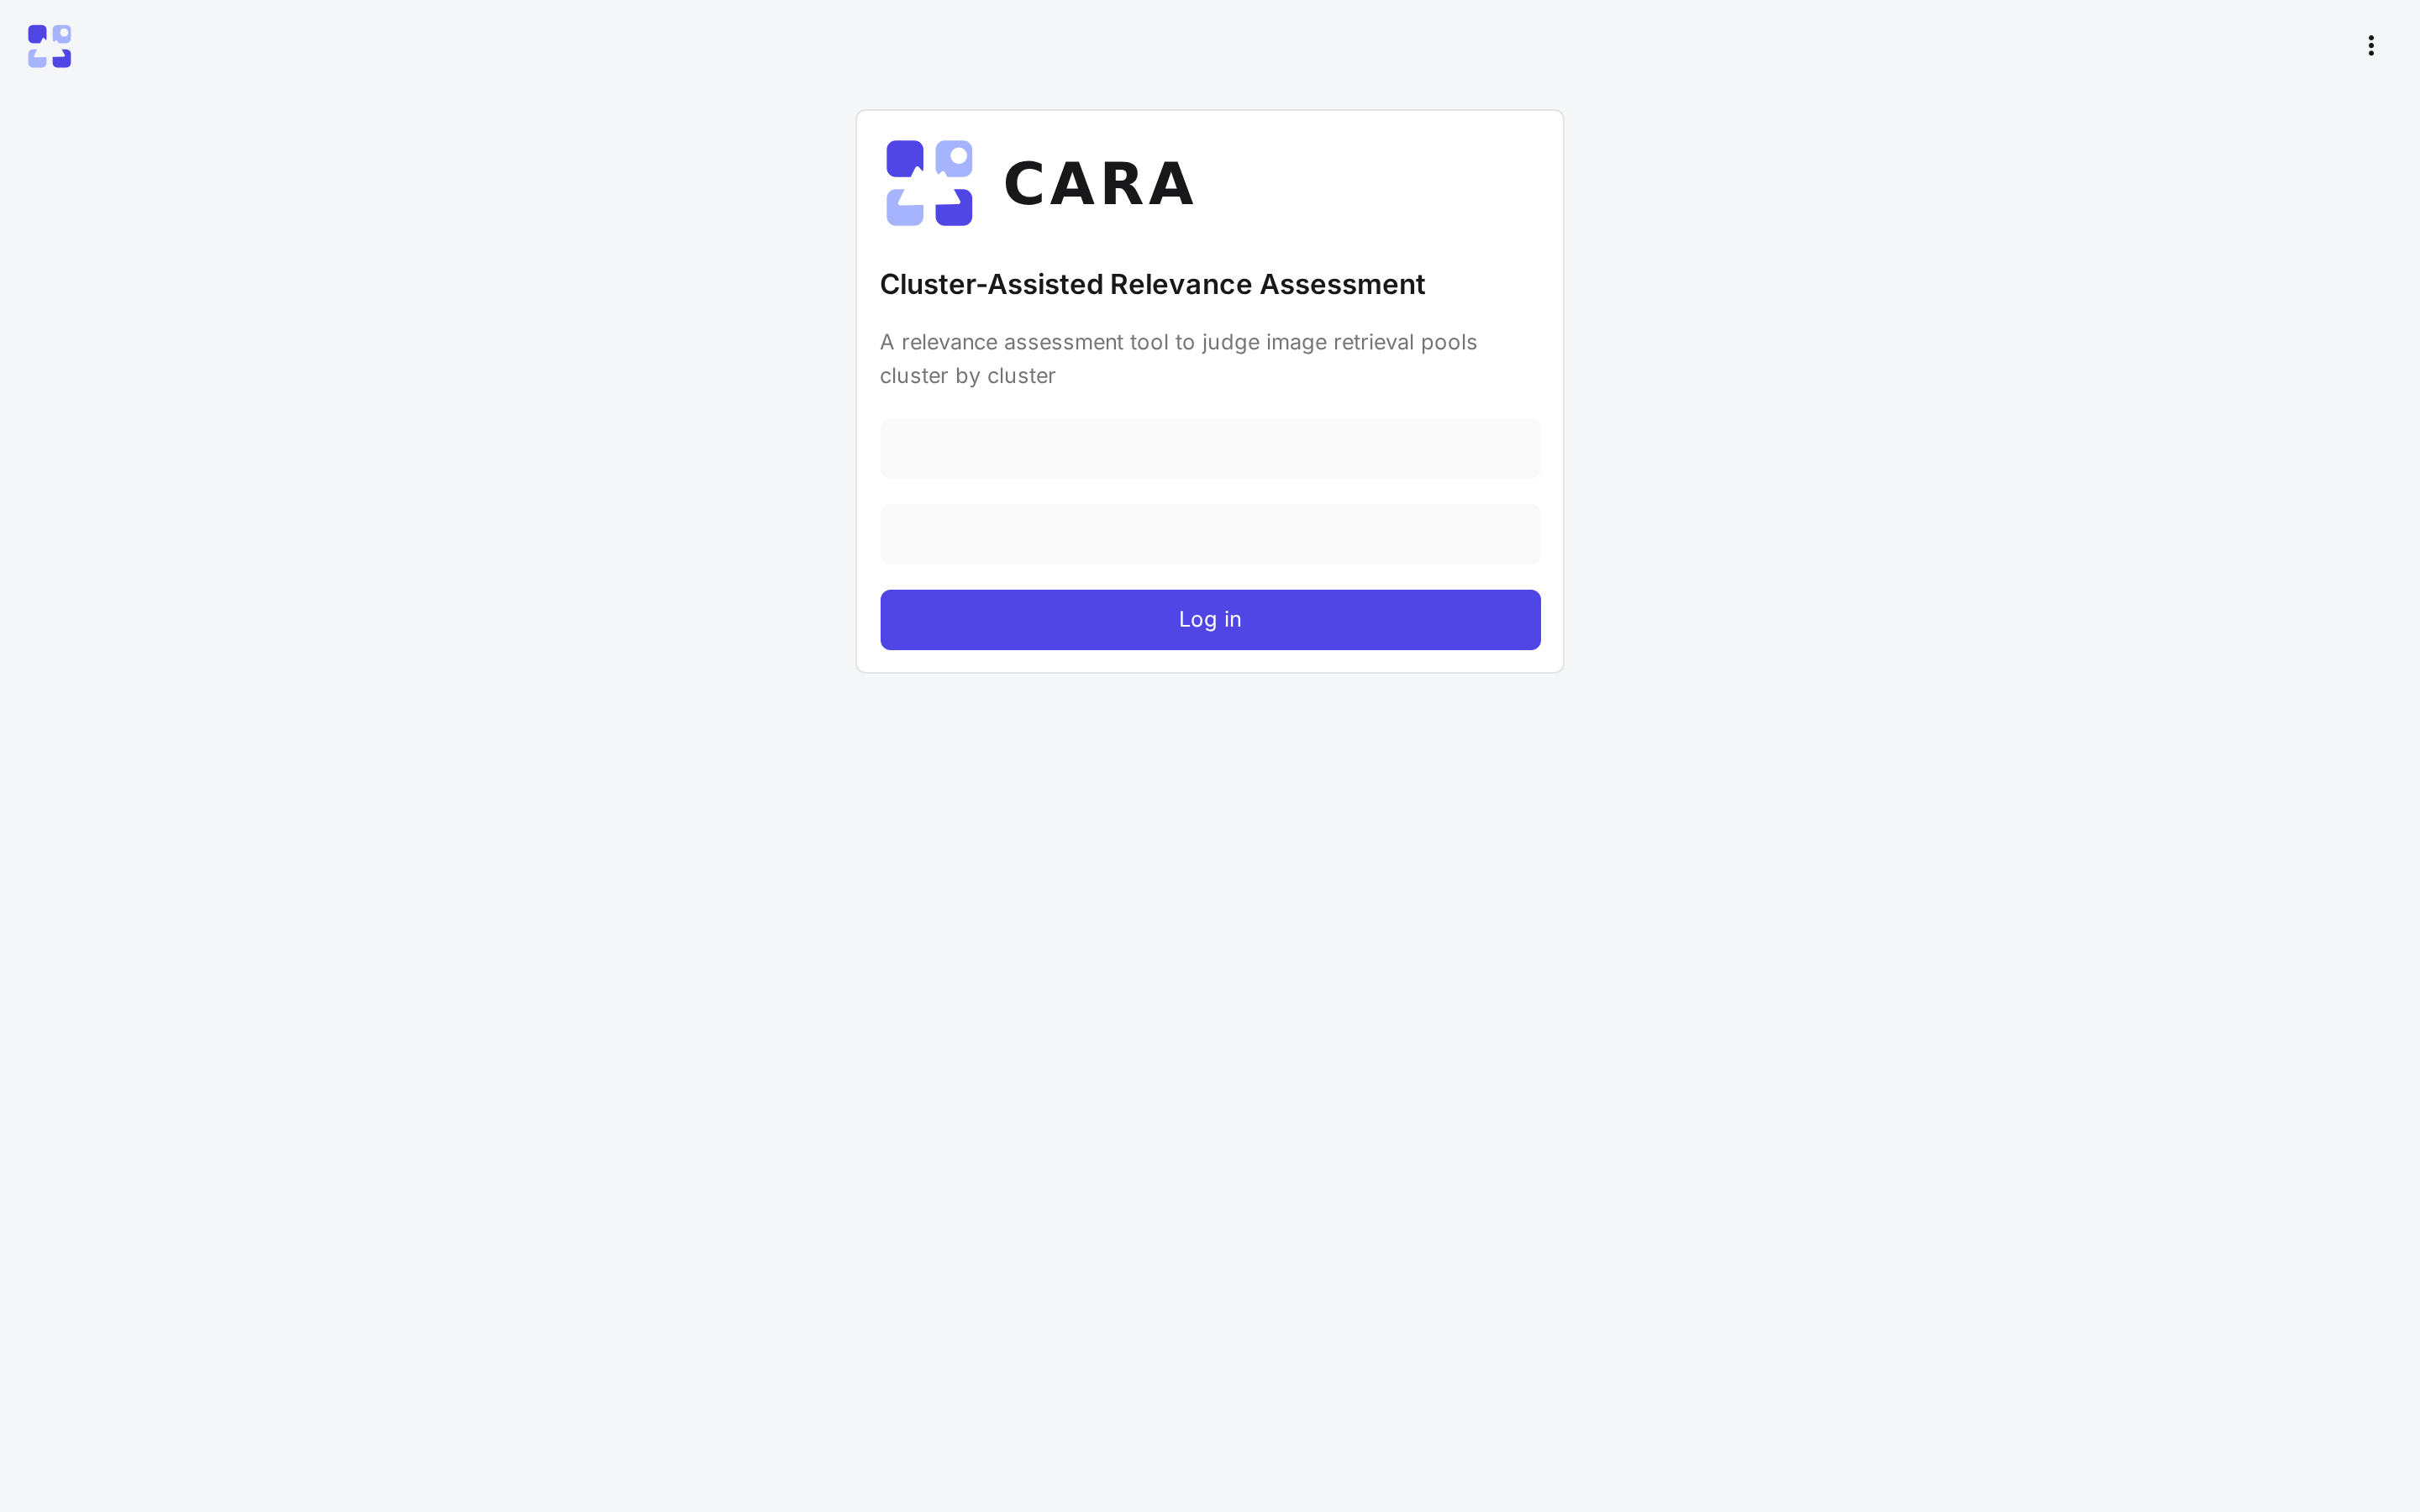
1. Log in
Open http://localhost:8501 and log in as admin, with the password quickstart.sh wrote to .env
(CARA_ADMIN_PASSWORD).
2. Open the study
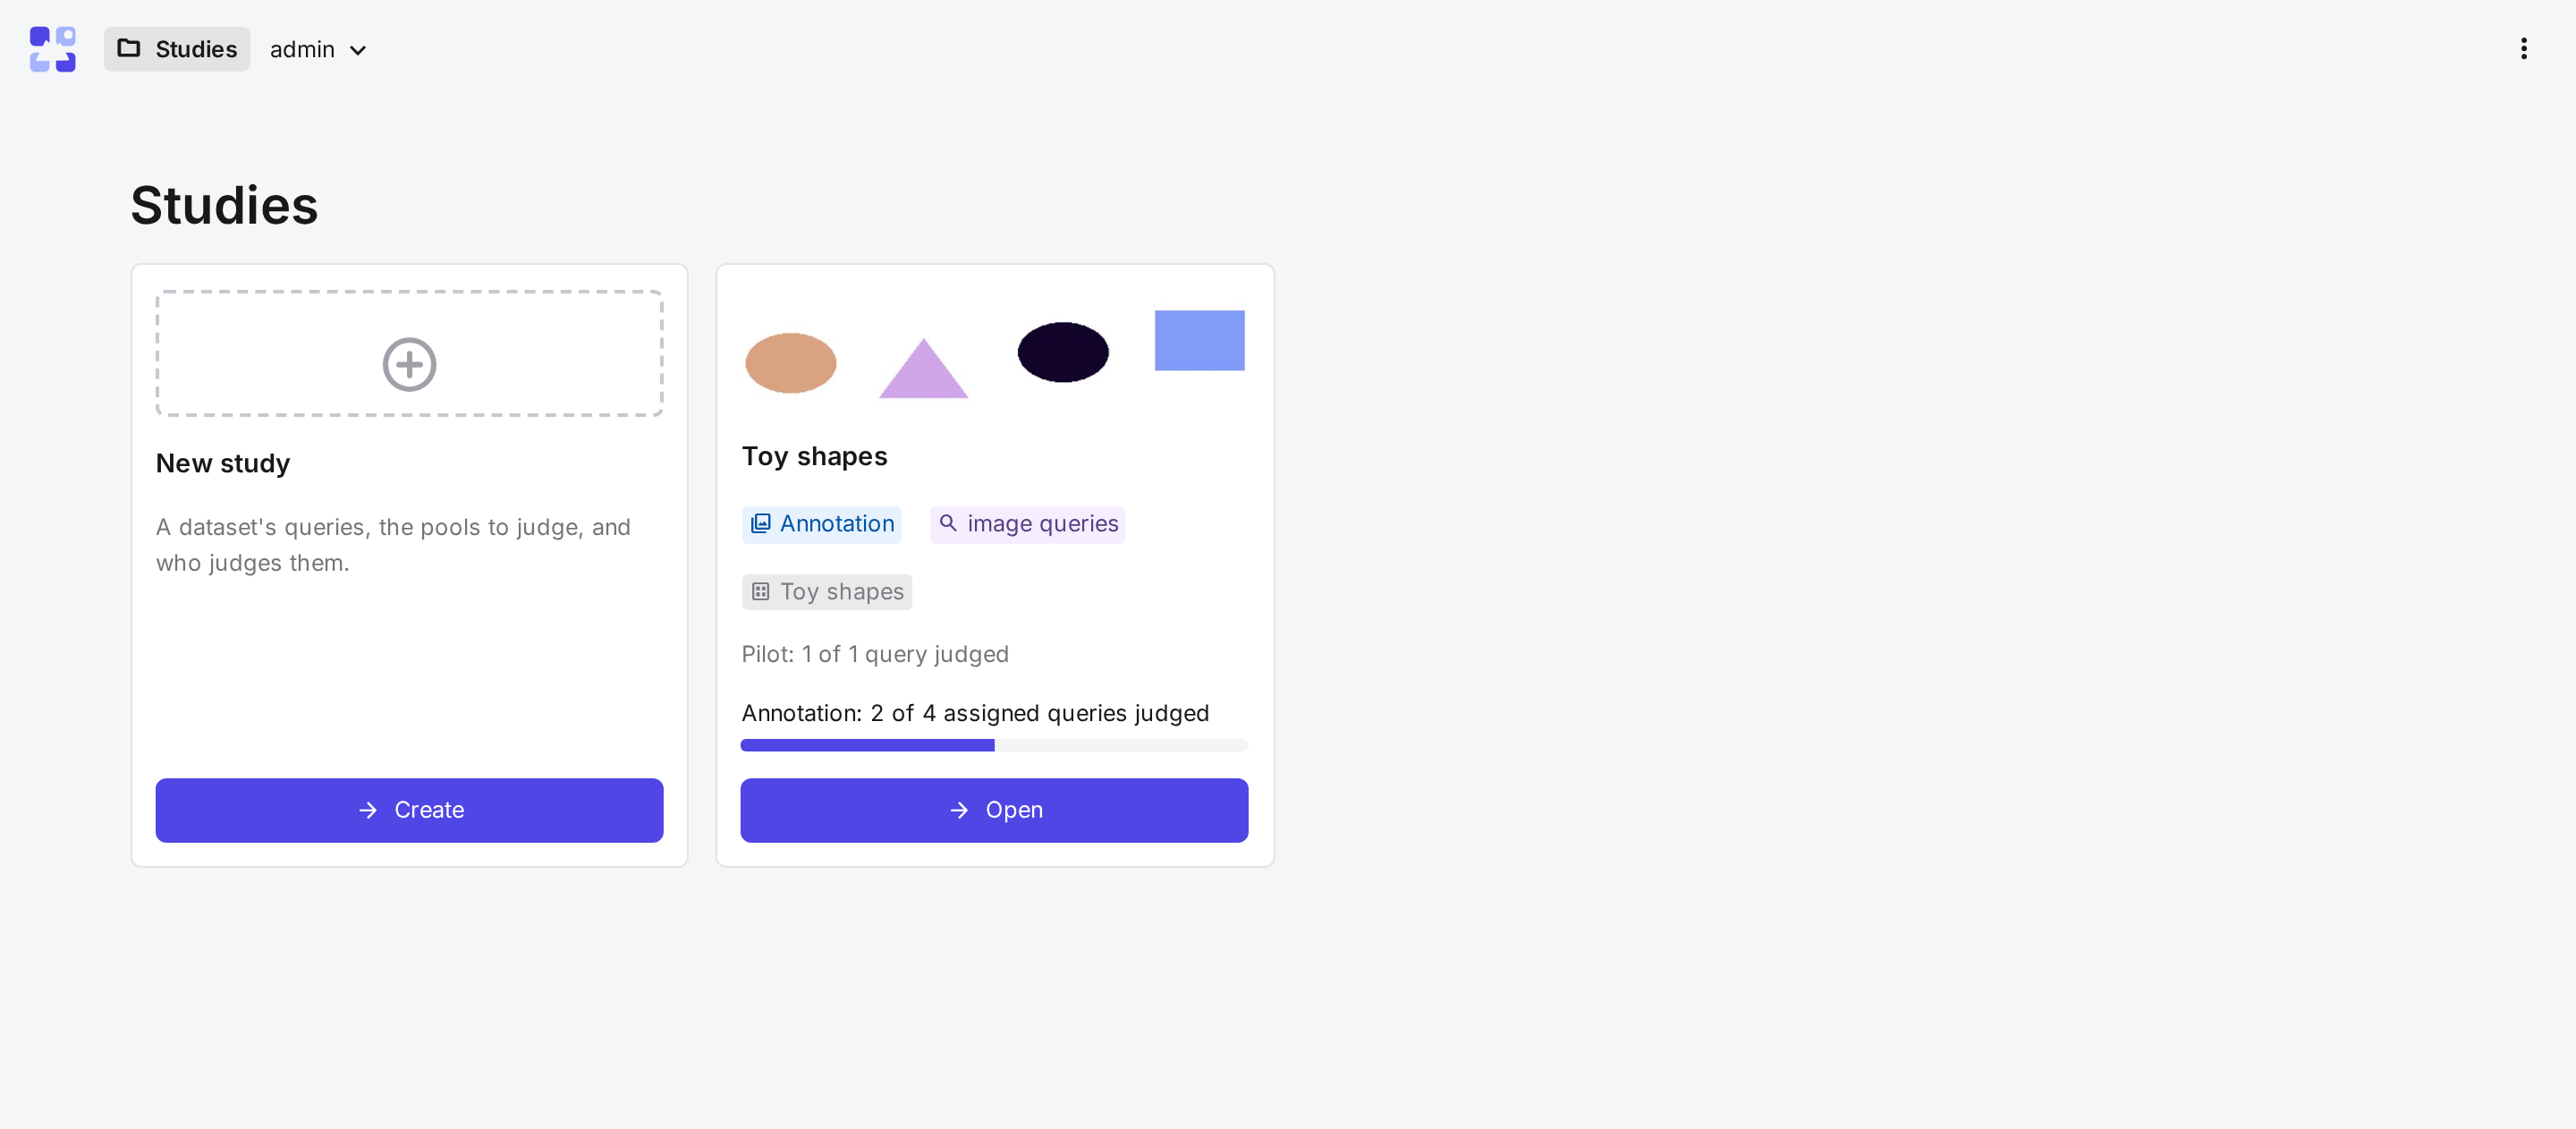
The Studies page shows one card per study, with its stage and progress. The toy study is already created: its pools are given
candidates, and its grouping encoder is pixels. Open on the Toy shapes card shows the study's tabs, in the order of the work: Guidelines, Pilot, Pilot results, Simulation,
Annotation, Progress and Results.
3. Write the guidelines
Guidelines holds what counts as relevant. Write one sentence in Text, such as "Relevant: the same shape in the same colour as the query", and save it. After a pilot, you can add examples from the images annotators disagreed on (Guidelines).
4. Run a pilot
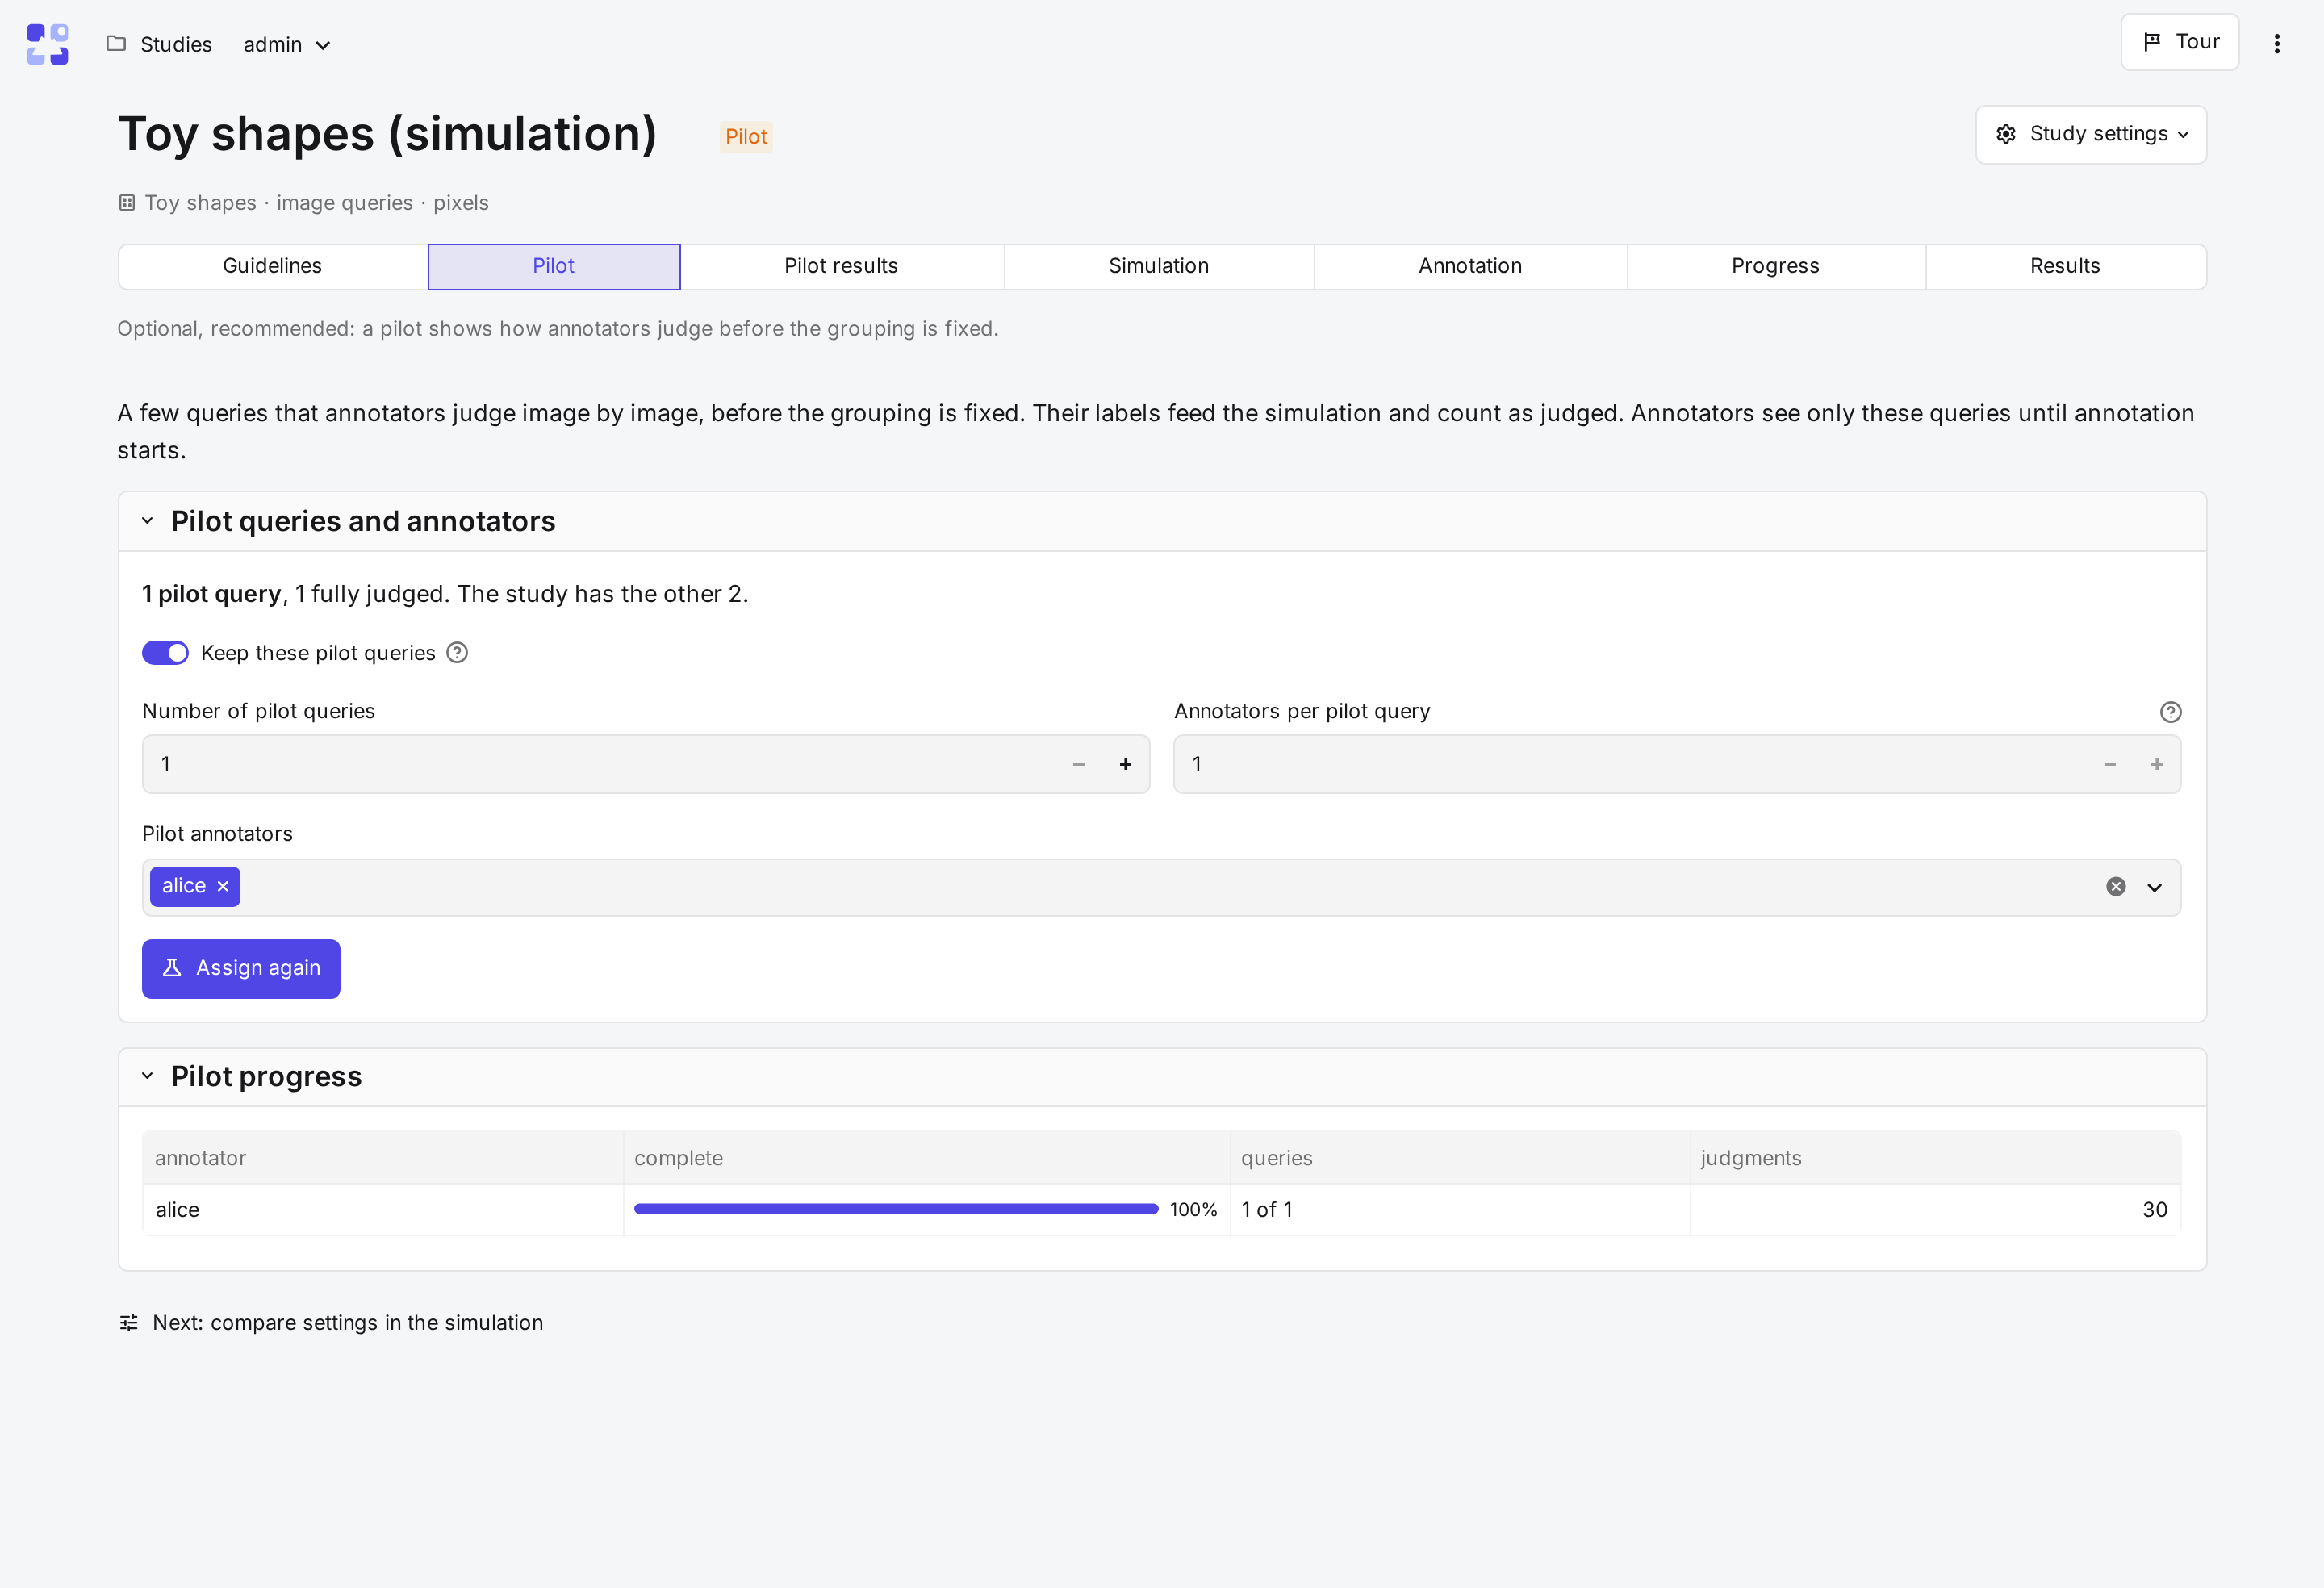
A pilot is a few queries that annotators judge one image at a time, before the grouping is fixed. It shows how they judge, and its labels let the simulator compare grouping settings on your own data.
In Pilot, under Pilot queries and annotators, set Number of pilot queries to 1, keep alice, and select
Start the pilot.
Now, as alice, select Judge on the study's card. Label each of the 30 images with the buttons under it:
Relevant, Not Relevant or Unsure.
5. Read the pilot results
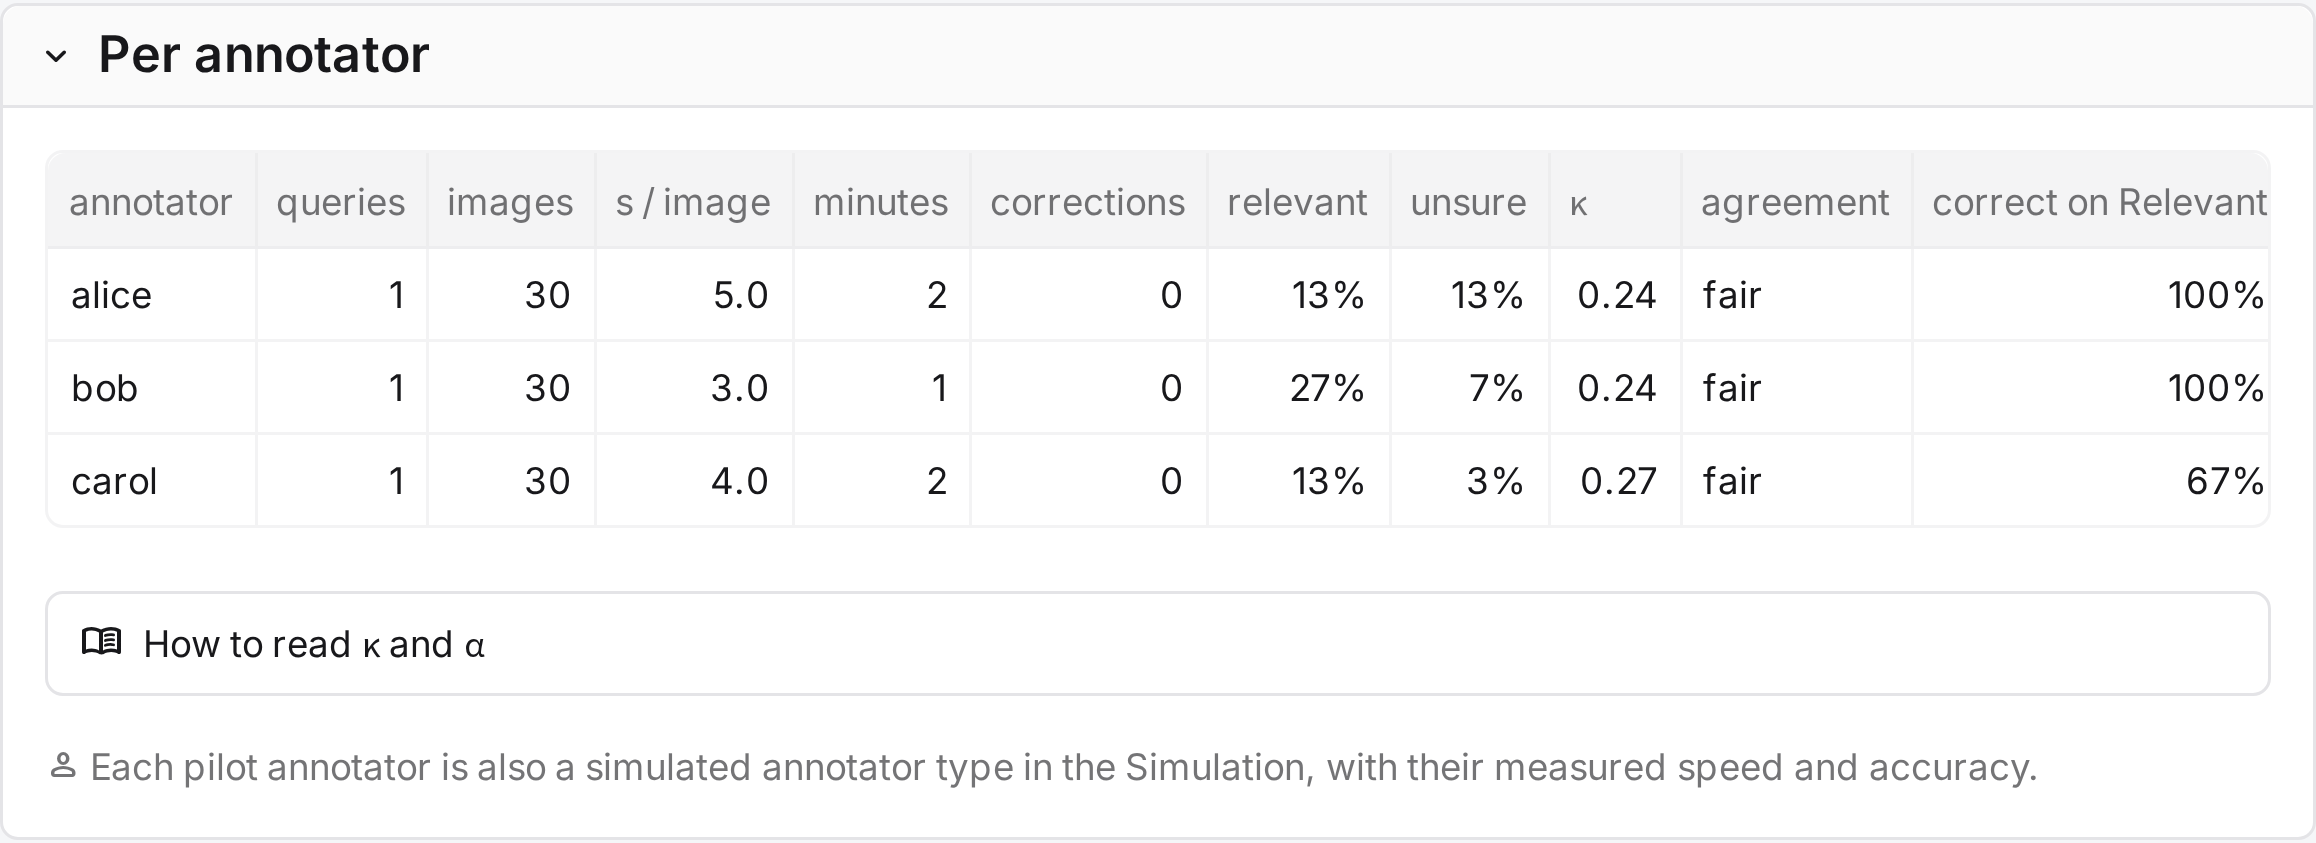
Back as admin, Pilot results shows how fast alice judged and how often they chose Relevant or Unsure. With
two or more pilot annotators it also shows how much they agree.
6. Compare grouping settings
Simulation replays the study's queries under the grouping settings you choose, with simulated annotators. It shows what each setting costs in time and how many relevant images it misses. Use alice's pilot labels as the ground truth, keep the default annotator types and methods, and select Run the simulation.
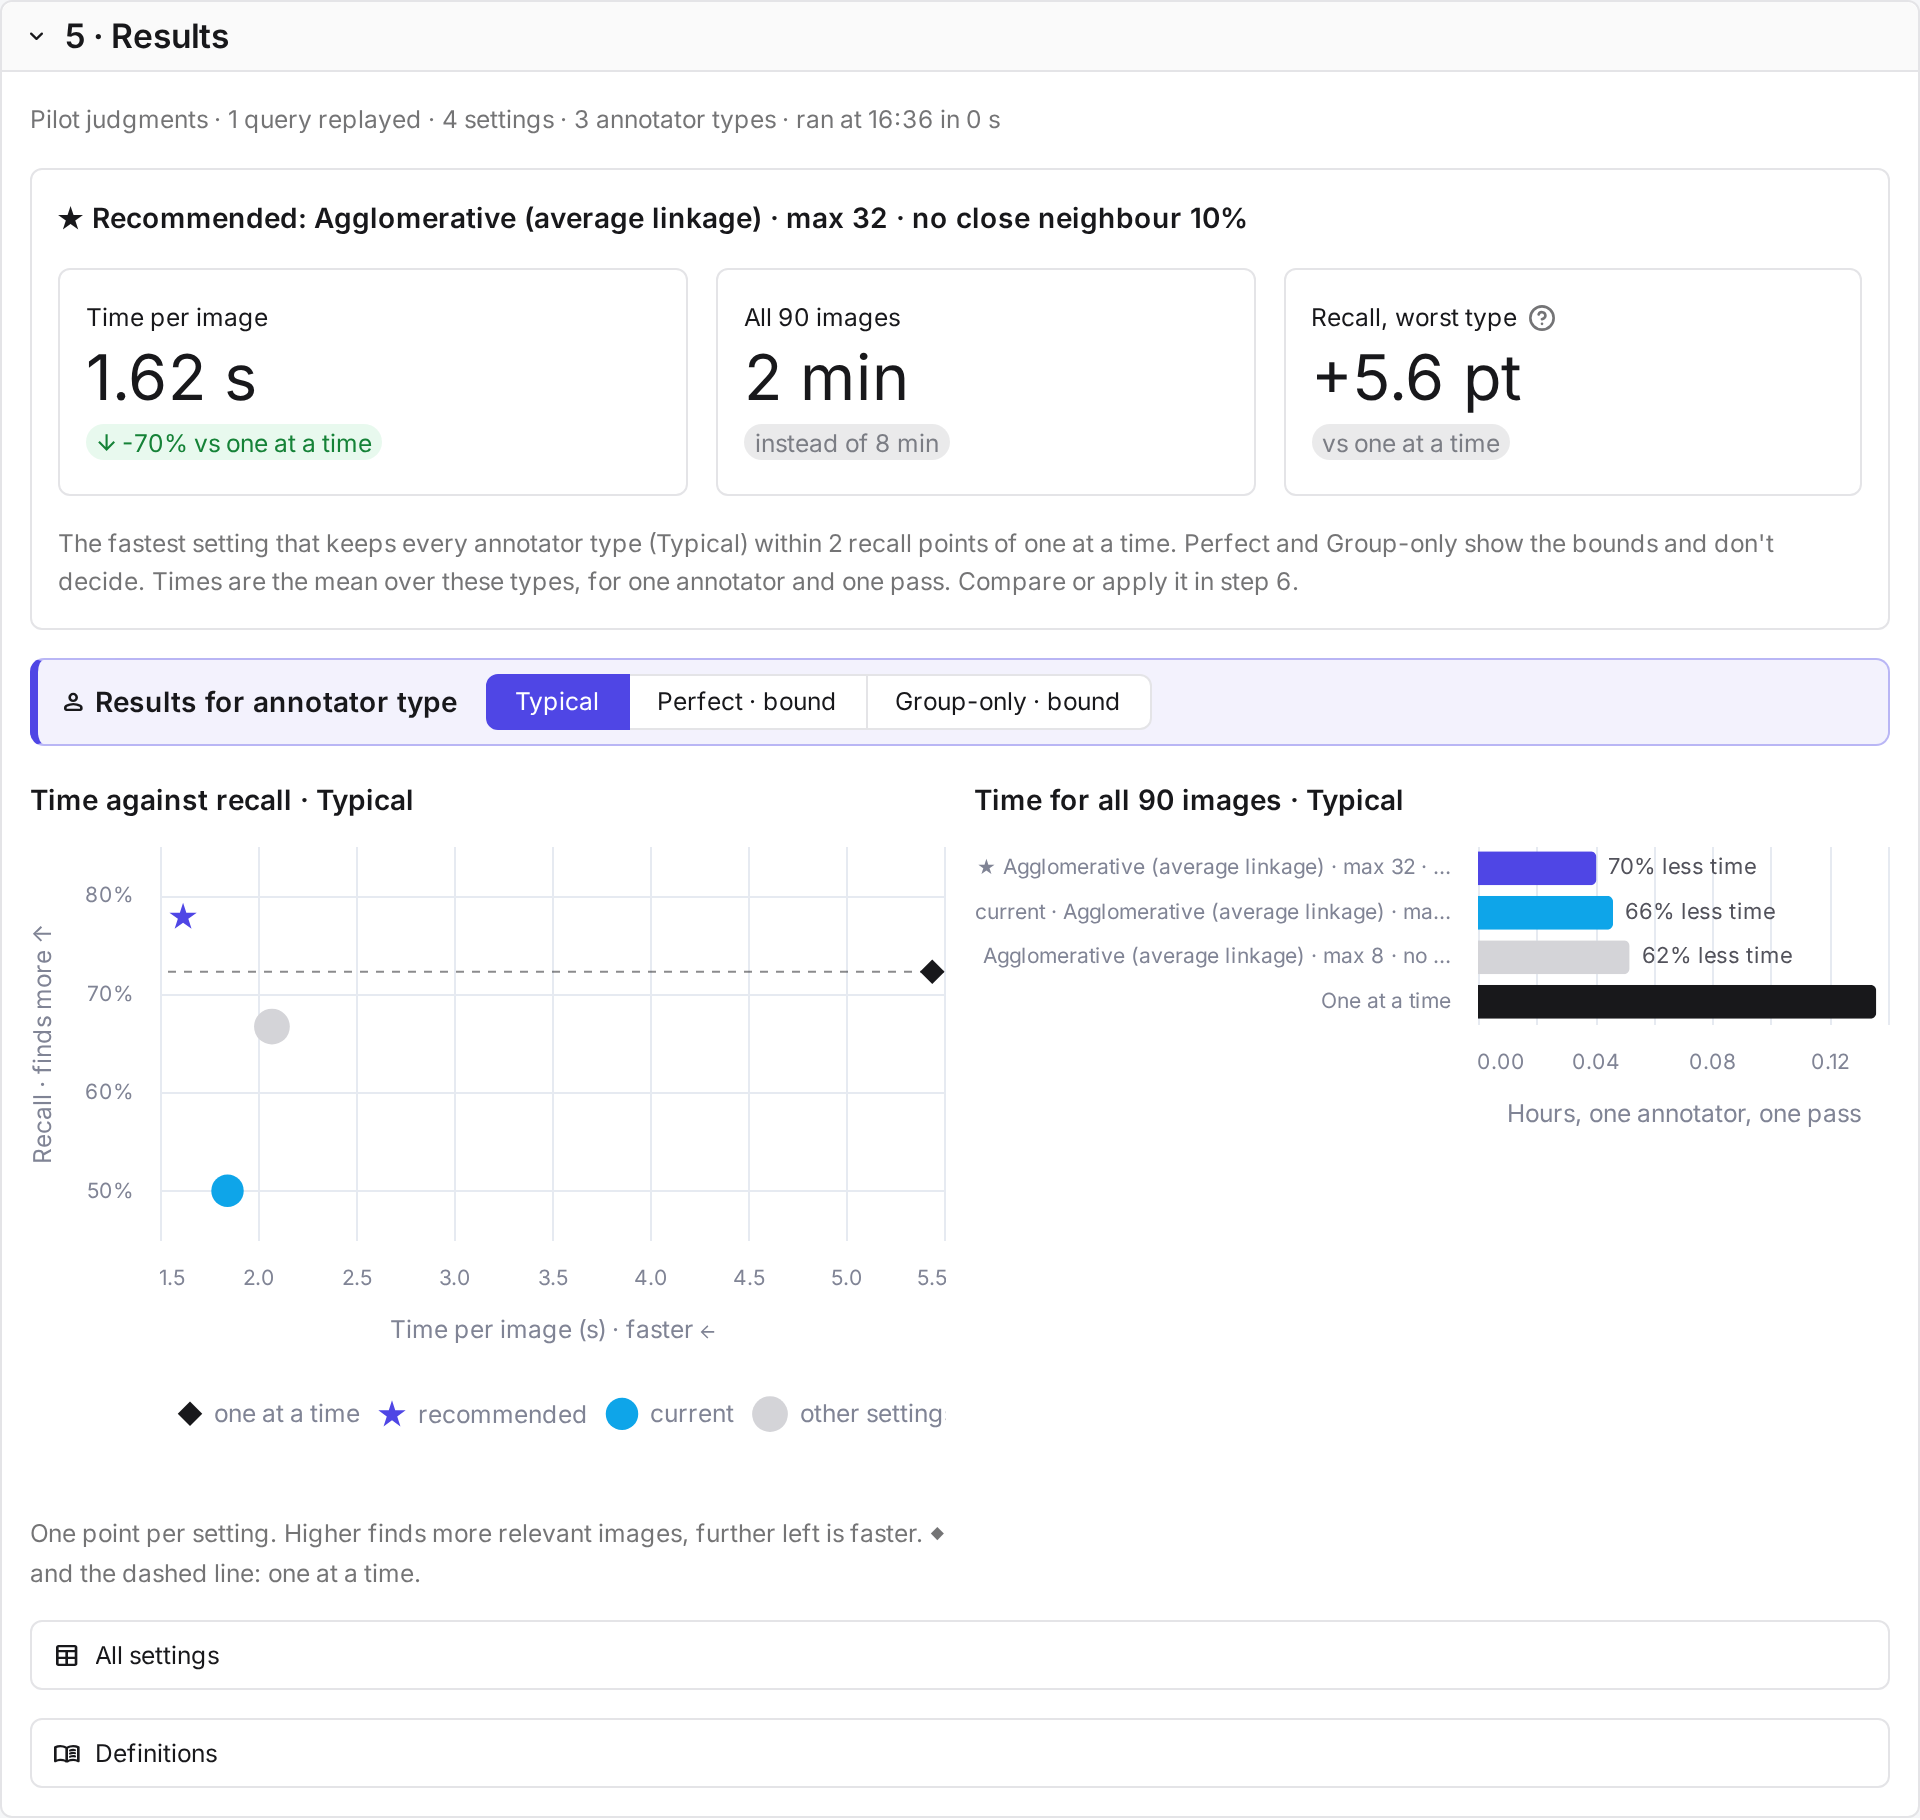
CARA recommends a setting, but the choice stays yours. Use this setting proposes the one you pick on the Annotation tab.
7. Start annotation
If you chose a setting, select Save and regroup every pool on the Grouping card of the Annotation tab. Until you save it, the study keeps its current grouping. Then select Start annotation, which assigns the remaining queries to the annotators.
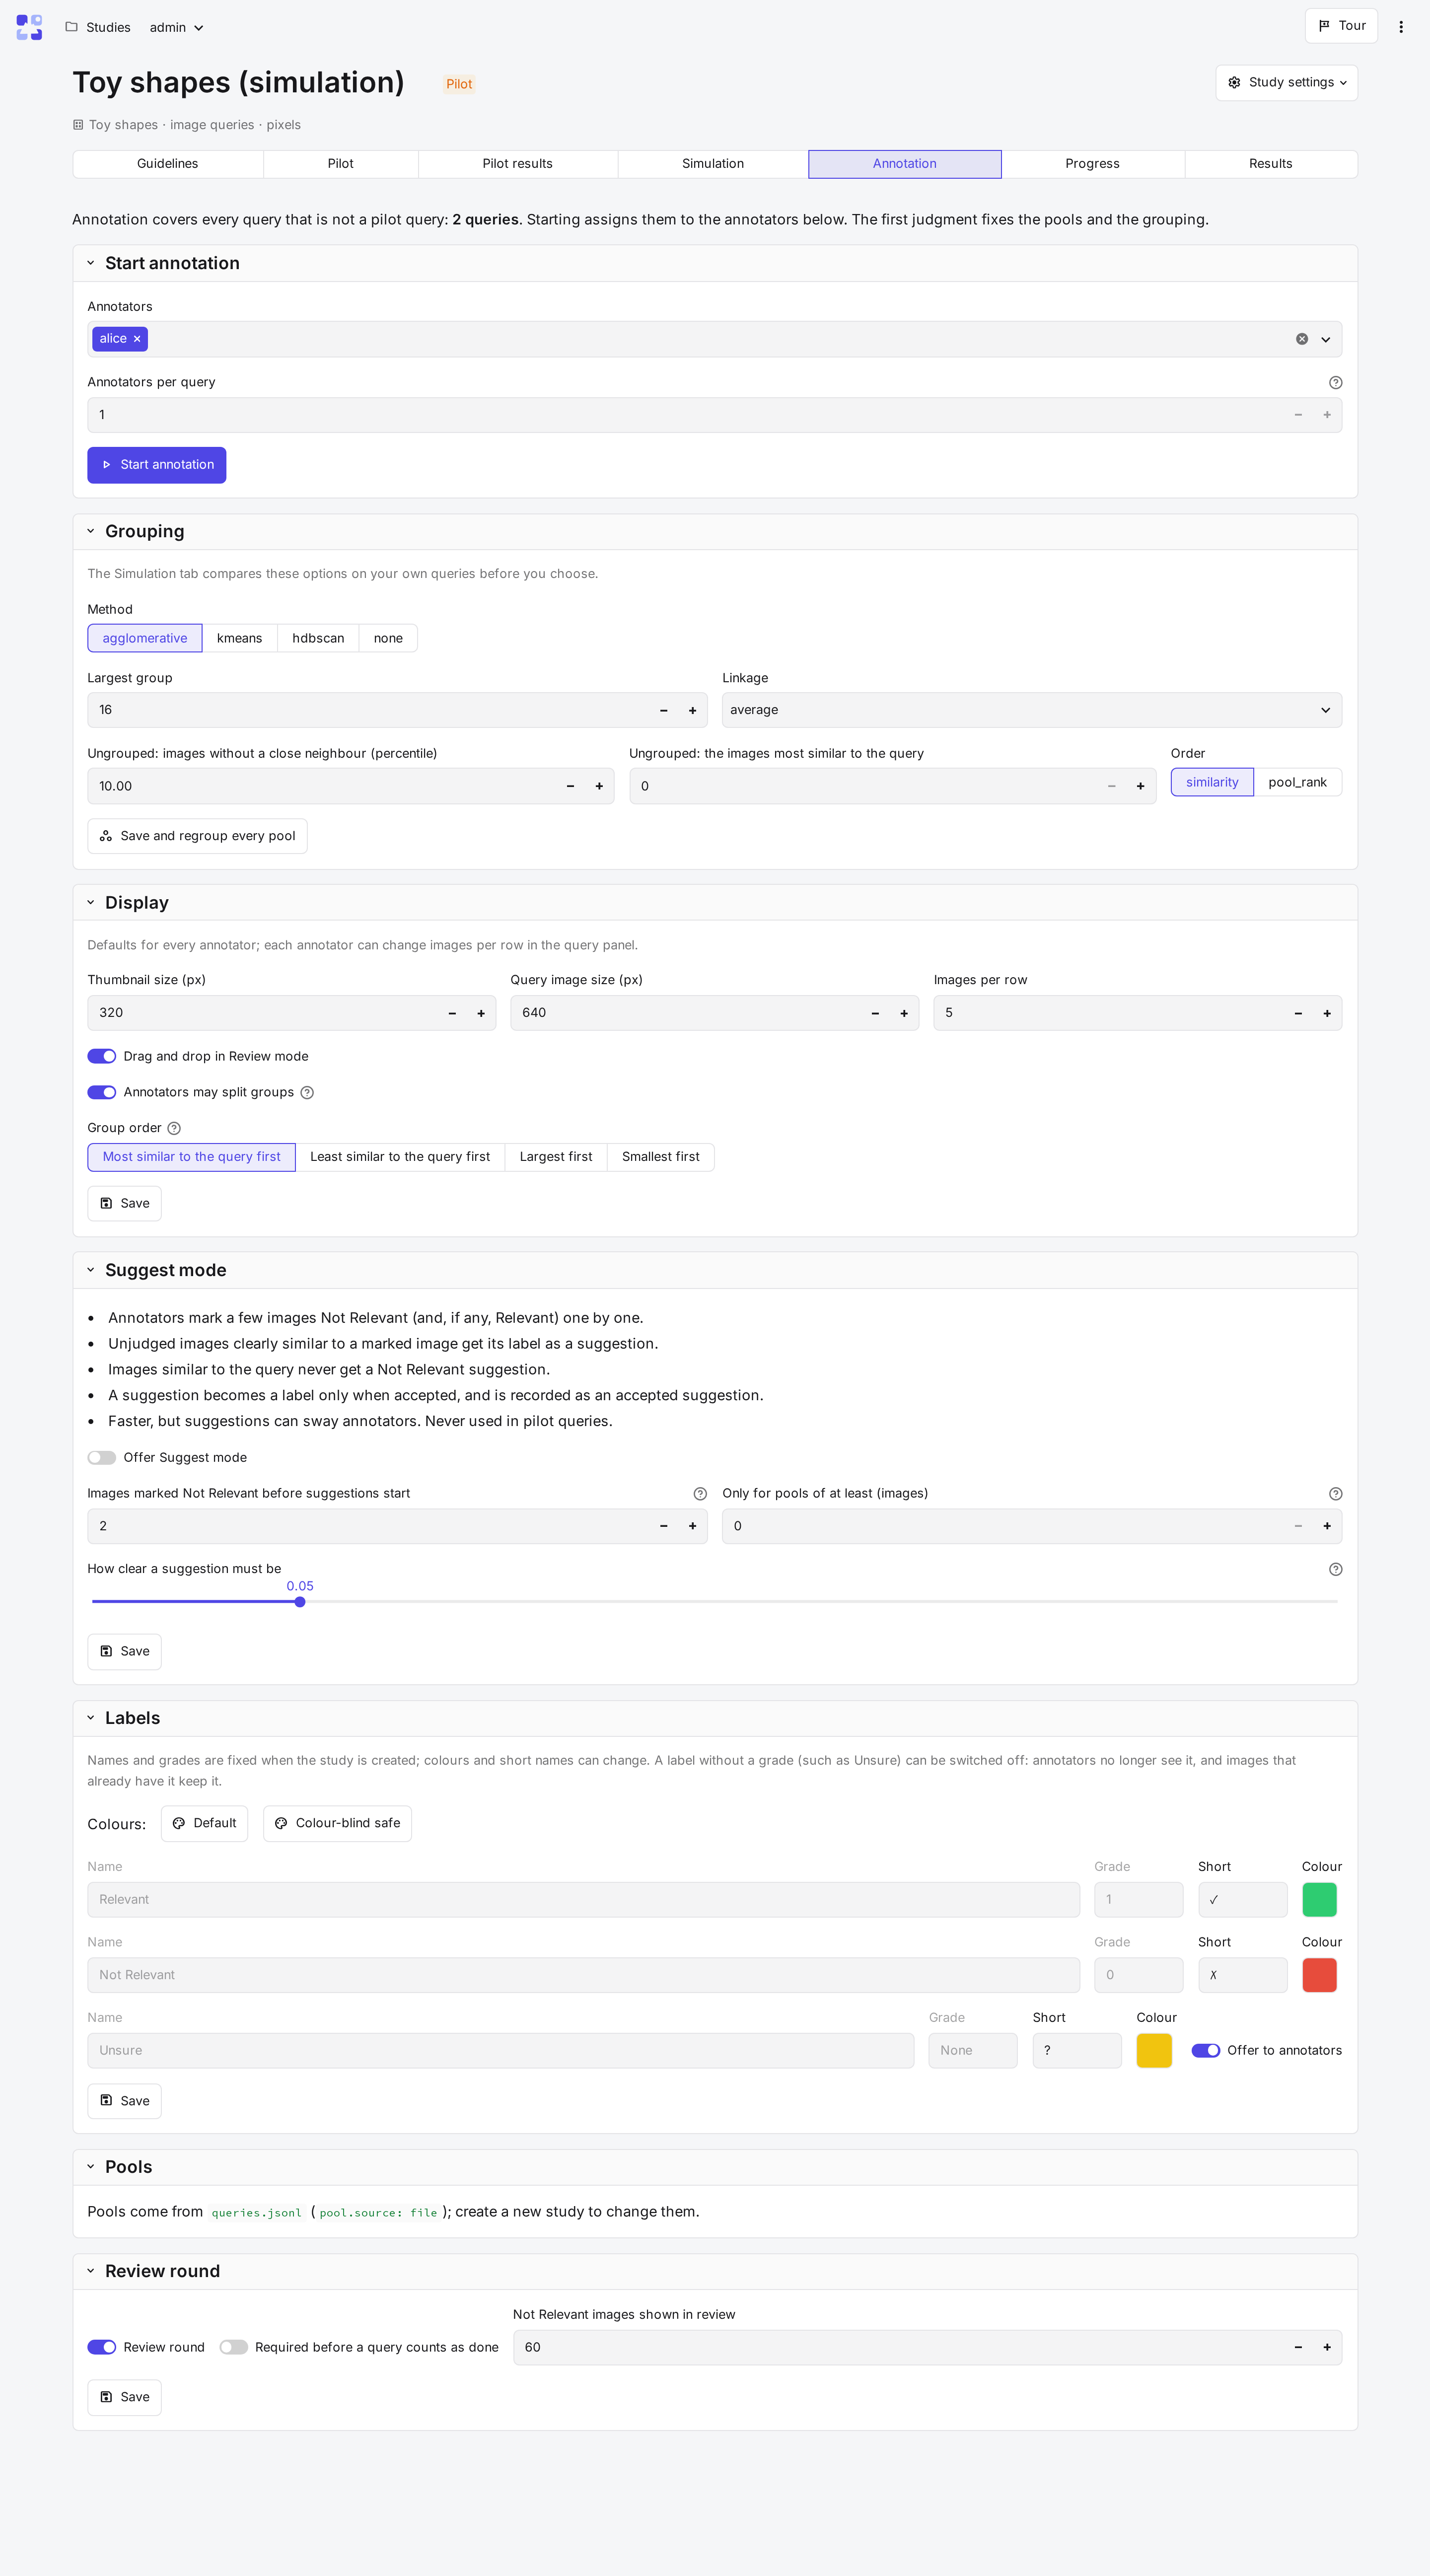
Warning
The first judgment of an annotation query locks the settings that would change what was judged: the pools, the grouping and the review rules.
8. Judge
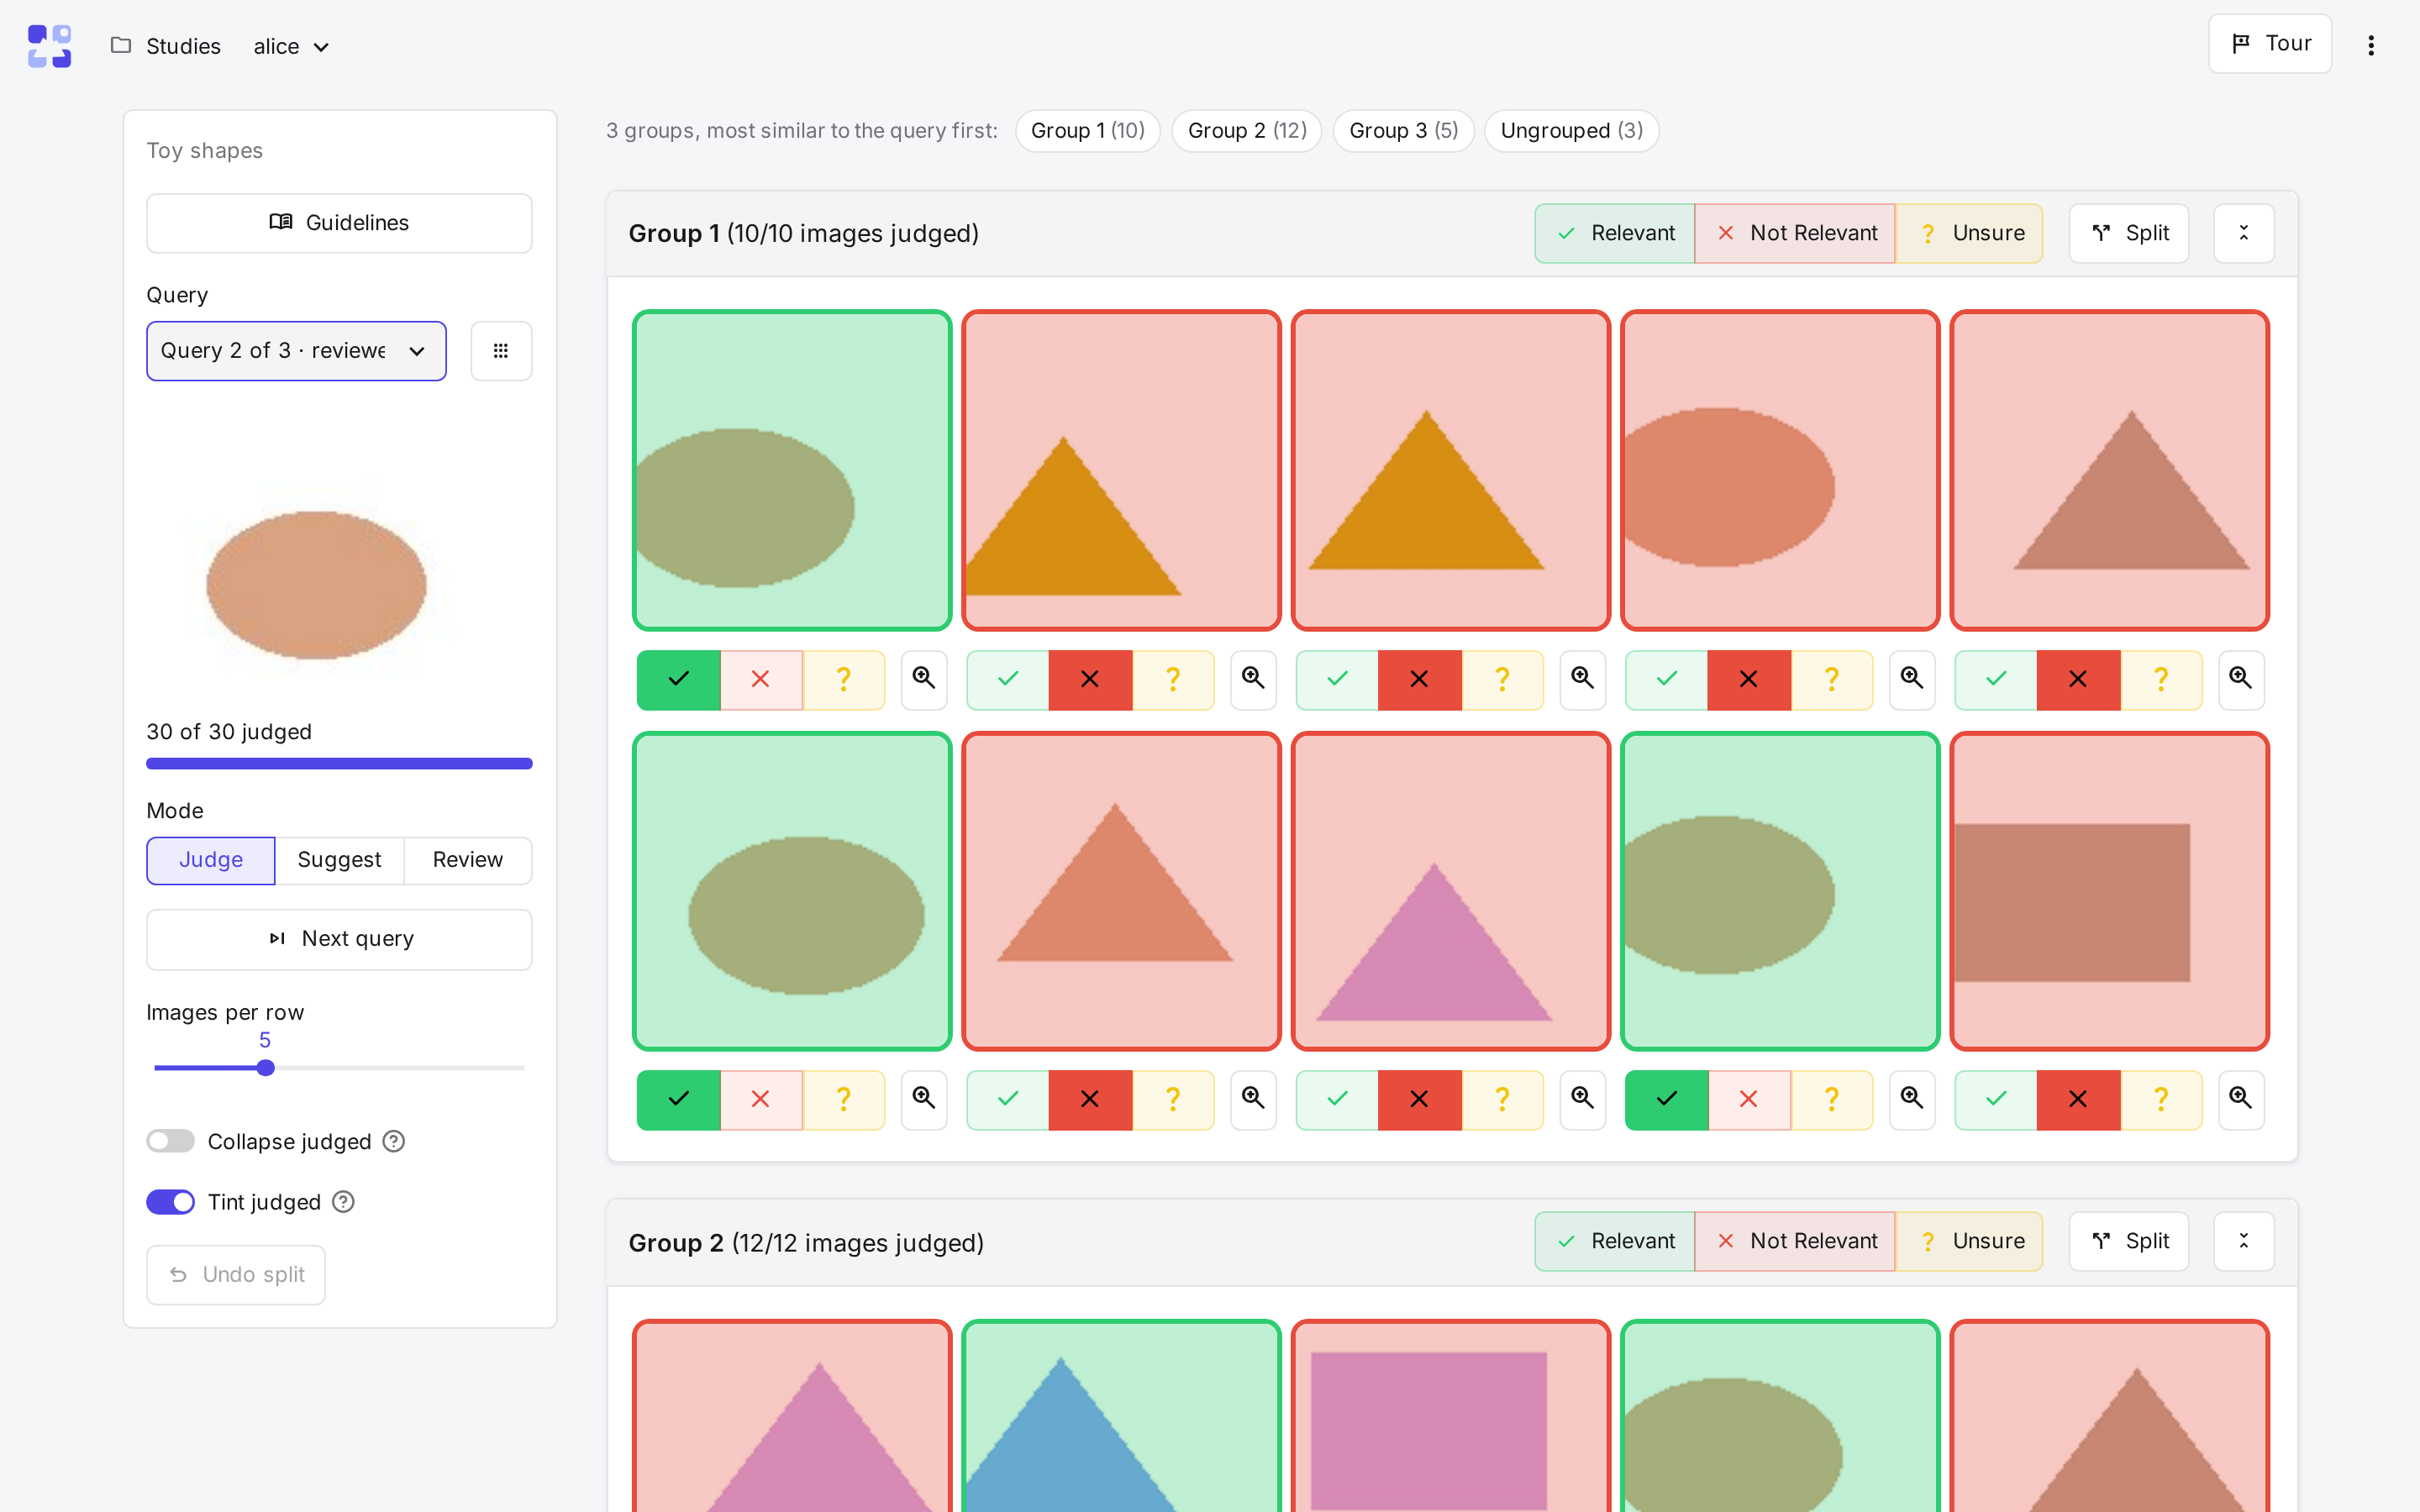
As alice, the judge page opens on the first unfinished query: the query on the left, its pool on the right, in
groups of similar images.
- The bar on a group labels every image in it; the buttons under an image label just that one.
- Split divides a mixed group in two.
- Once every image has a label, Review shows them sorted by label, to check and correct.
- Next query moves on.
Every click is saved at once. The Tour button at the top right explains the page step by step.
9. Follow progress and export
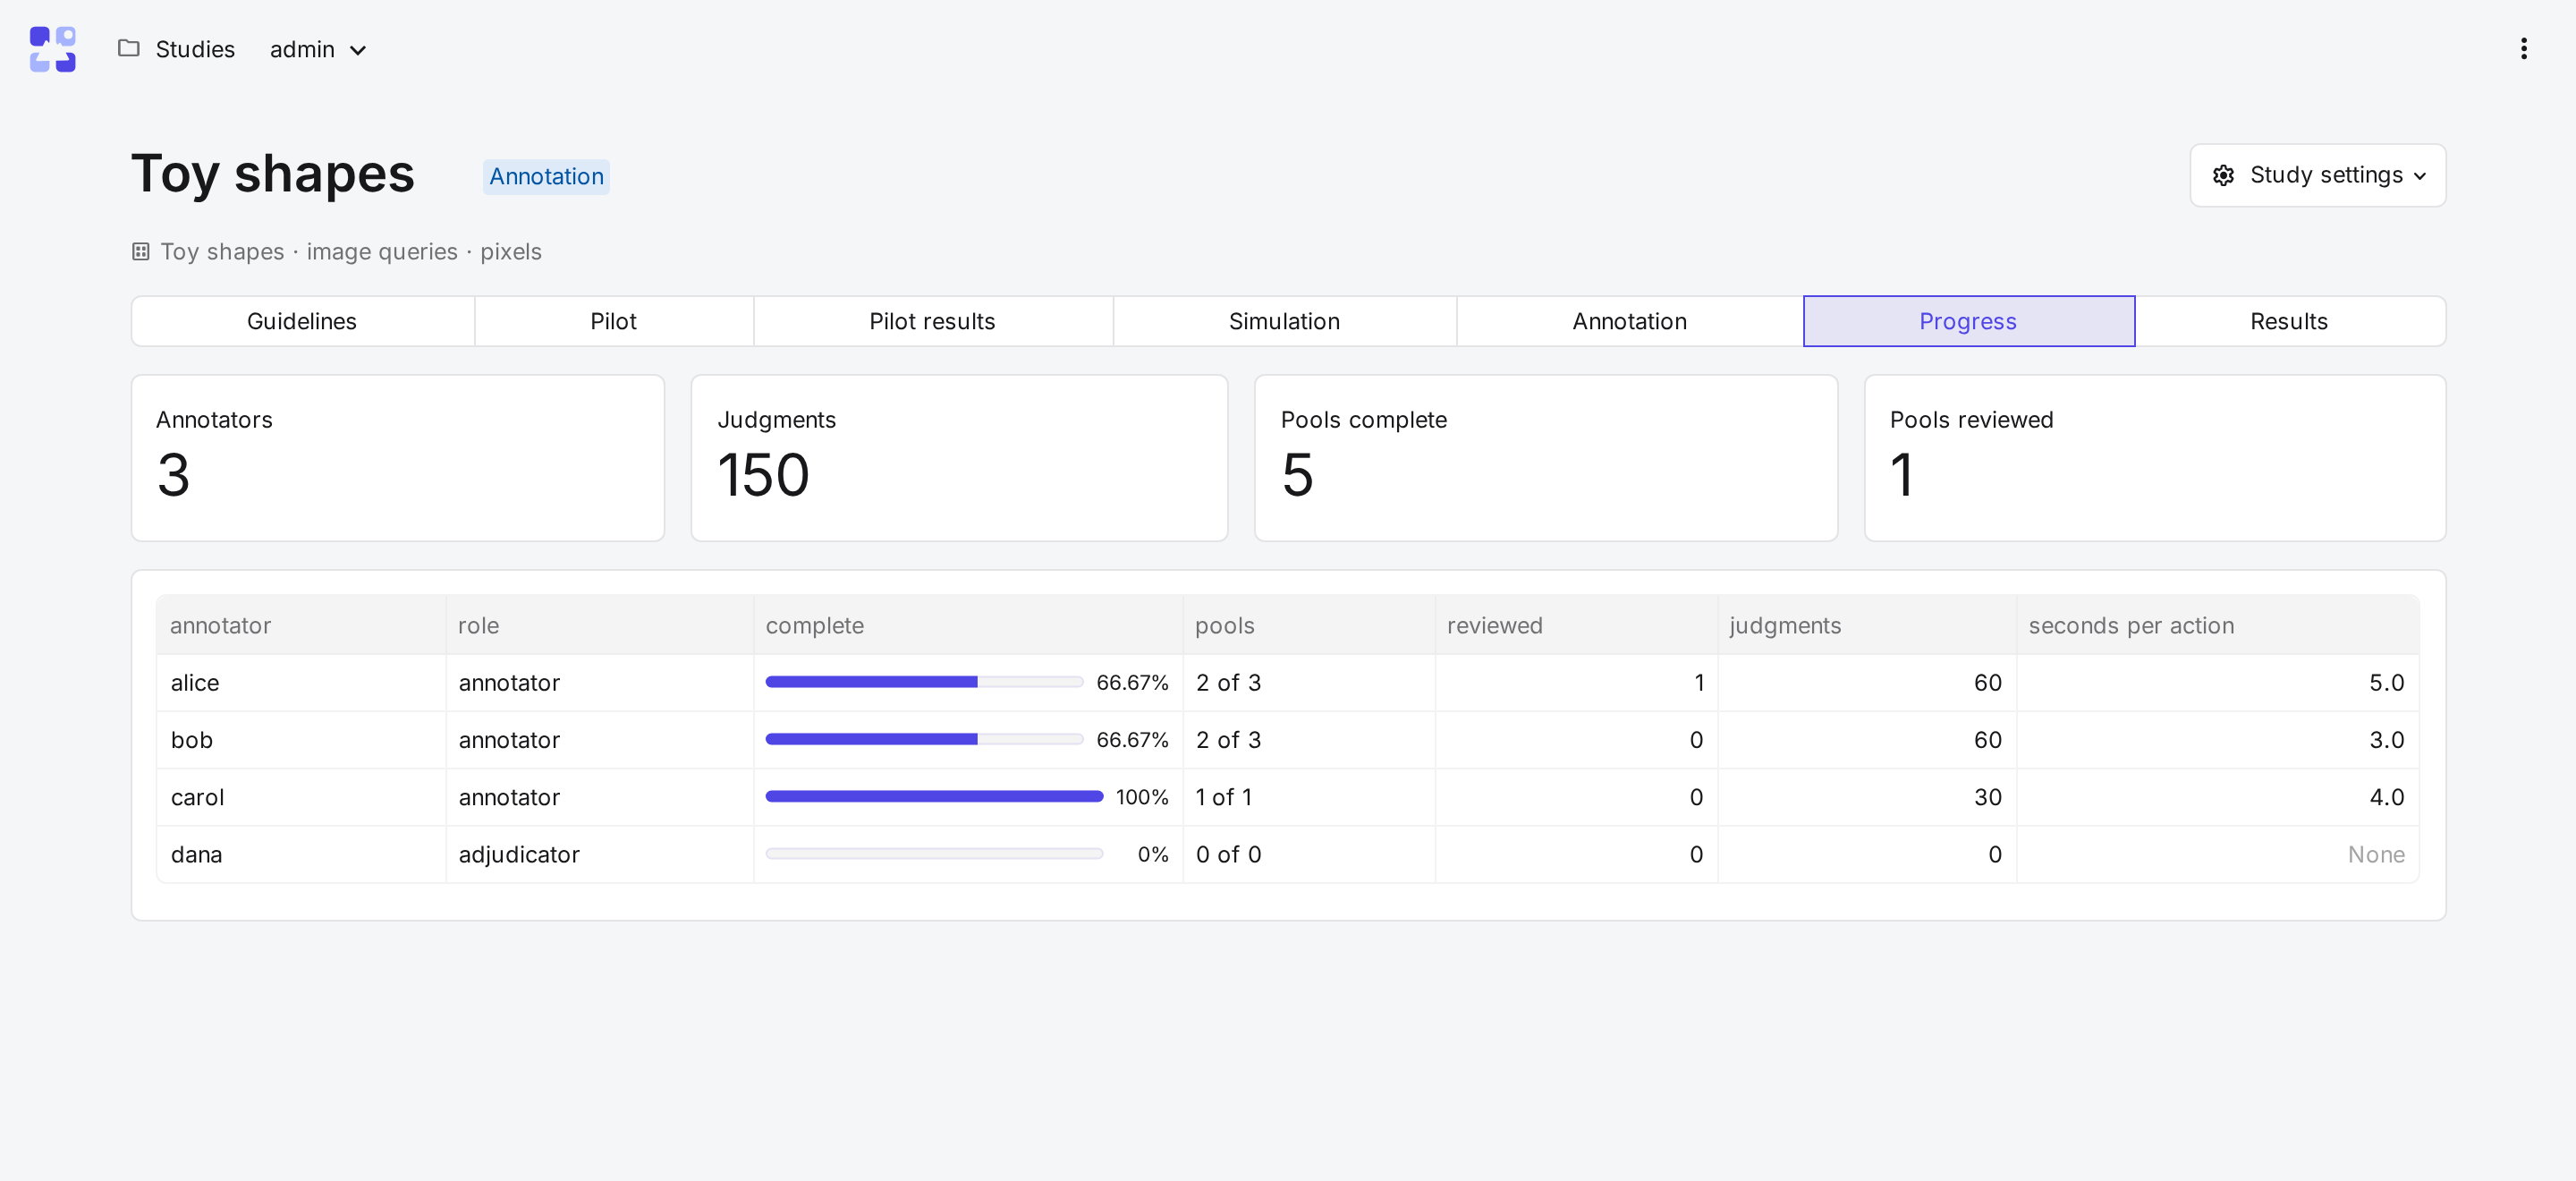
As admin, Progress shows each annotator's queries, judgments and time. Results shows the agreement,
sets the final labels where annotators disagree, and exports the qrels, training pairs and action log.
What you did
You ran the whole workflow: guidelines, a pilot, a simulation to choose the grouping, annotation and export. To judge your own collection, start with Datasets.